
How to Prep Your CT Home for Exterior Painting


When it comes to giving your home or business a fresh new look, the secret to a flawless, long-lasting finish doesn’t lie in the paint itself—it lies in the preparation. If you live in New England, you know that our homes take a beating. From freezing, icy winters to hot, humid summers, the weather here is tough on building materials. That is exactly why doing the proper prep for exterior painting is the single most important phase of any home improvement project.
As experienced local painting professionals, we’ve seen what happens when preparation is rushed. Paint peels, wood rots, and homeowners are left paying for another paint job just a few years later. Whether you own a historic colonial in Hartford, a coastal home in New Haven, or a commercial storefront in Stamford, this comprehensive guide will walk you through the exact steps needed to protect your investment and guarantee a beautiful result.
Why Thorough Prep Steps Matter in Connecticut
Connecticut’s unique climate makes painting a distinct challenge. The dramatic temperature shifts cause wood and other siding materials to expand and contract constantly. If the surface isn't meticulously prepared, the new paint will fail to adhere properly to the substrate.
Skipping essential prep steps can lead to moisture becoming trapped beneath the new coat, accelerating rot and mold growth. By taking the time to thoroughly clean, repair, and prime your exterior surfaces, you create a stable foundation that allows premium paints to perform exactly as designed, often extending the lifespan of your paint job by up to a decade.
The 5 Essential Steps to Prepare Your Home
Step 1: Inspection and CT Siding Care
Before you ever pick up a brush or a scraper, you need to know exactly what you are dealing with. A thorough inspection is the cornerstone of good CT siding care. Walk the perimeter of your residential or commercial property and look for signs of damage. Pay close attention to areas near the ground, under the eaves, and around windows and doors.
- Look for rotting wood or soft spots on clapboards and trim.
- Identify areas with heavy mildew, mold, or algae growth.
- Check for missing or damaged caulk around seams and joints.
Step 2: Power Washing and Cleaning
Paint will not stick to dirt, pollen, or mildew. Power washing (or soft washing for delicate historic homes) is required to strip away years of grime. Use a high-quality exterior cleaner mixed with a mildewcide to kill off any organic growth. Allow the home to dry completely—this can take several days depending on the humidity and sunlight—before moving on to the next step.
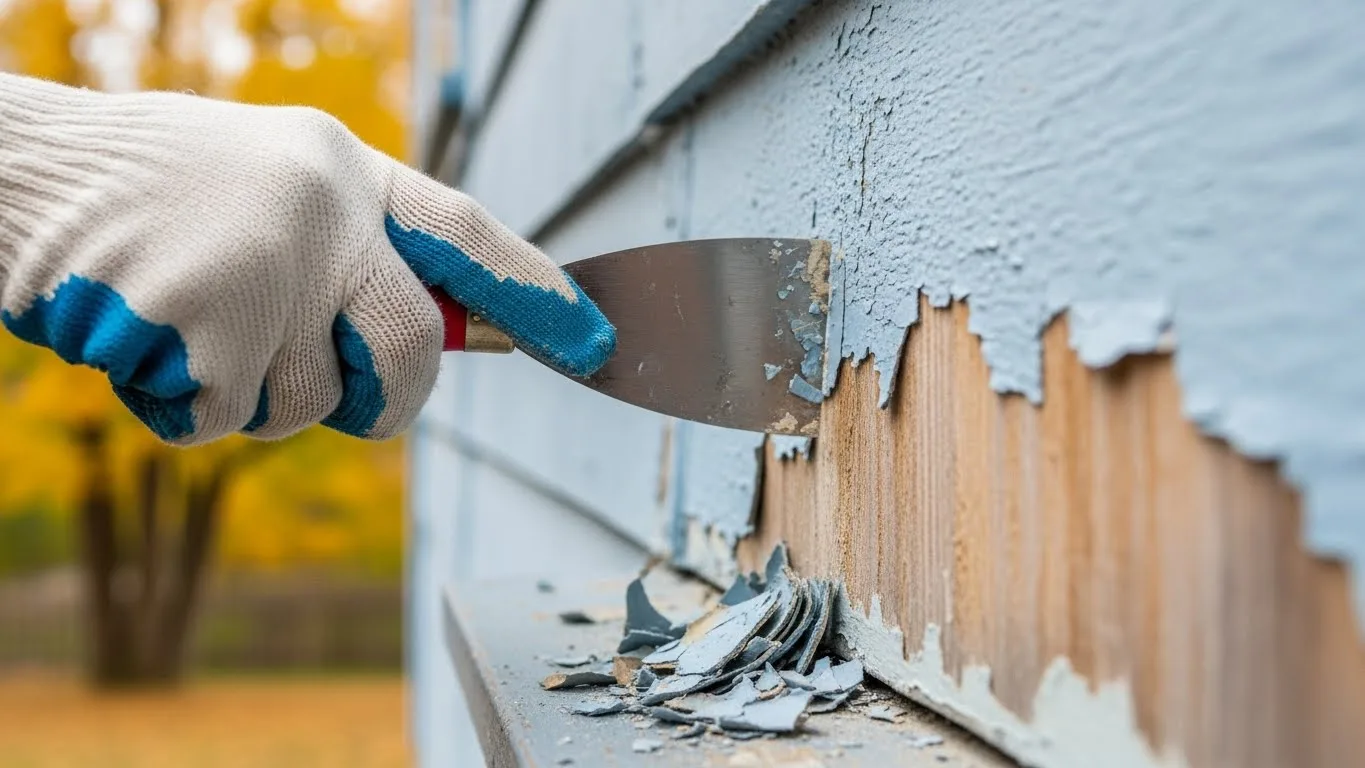
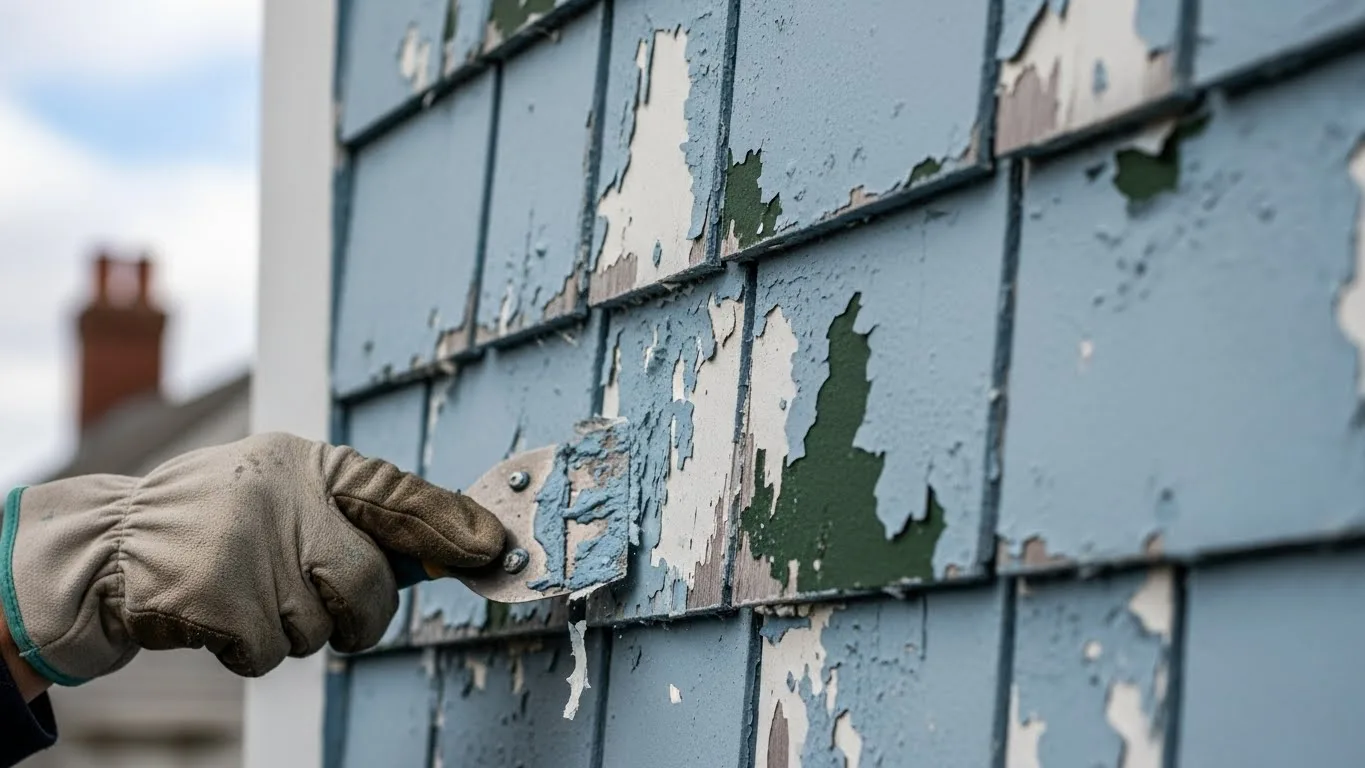
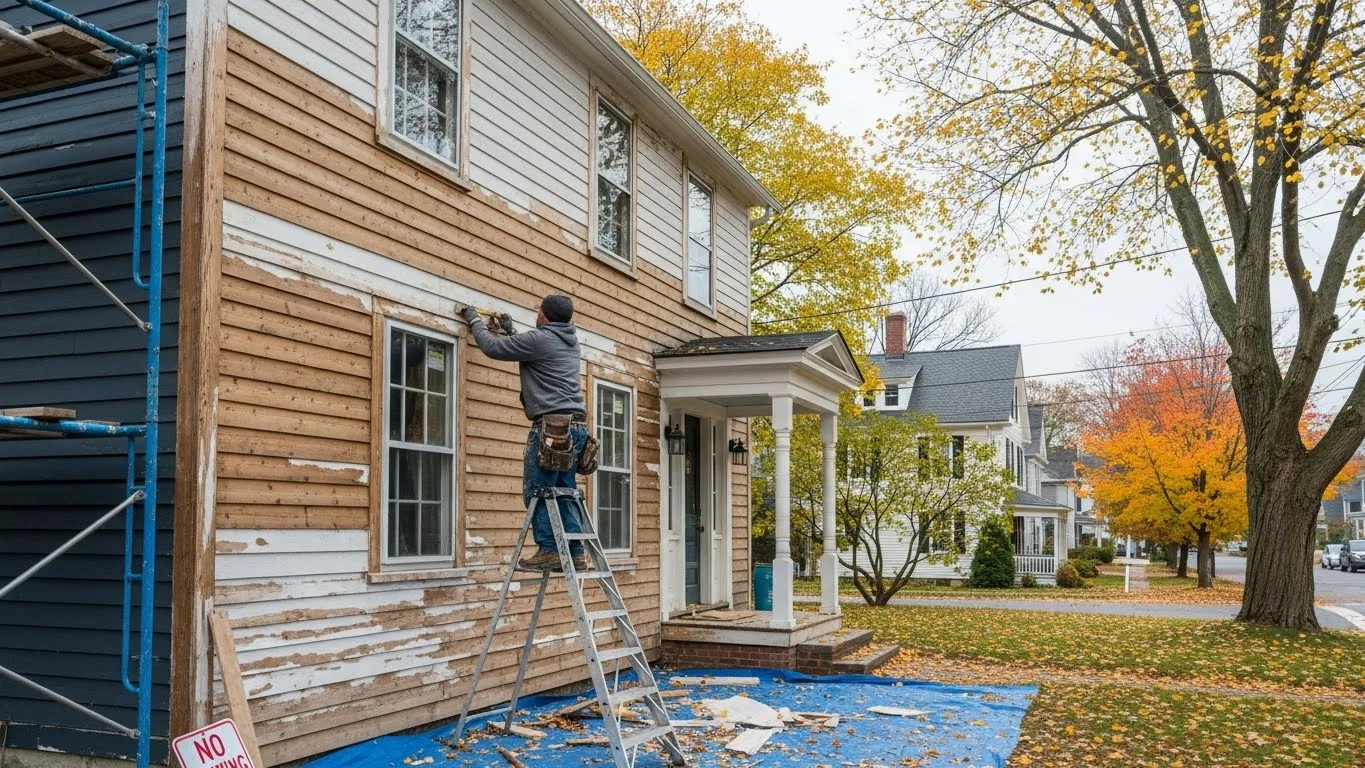
Step 3: Scraping Old Paint and Sanding
Once the house is completely dry, the hard work begins. Scraping old paint CT homes are known for (especially older properties with multiple layers) requires patience and a steady hand. Remove all loose, flaking, or blistering paint down to a firm edge.
Following the scraping, sanding exterior CT surfaces is crucial. Sanding smooths out the ridges between the bare wood and the remaining old paint, known as "feathering." This ensures that the final coat looks uniform and smooth, rather than patchy and uneven.
Step 4: Making Repairs and Caulking
Any wood that was identified as rotten during your initial inspection must be replaced or repaired with a high-quality wood filler. After the repairs are sanded smooth, apply a premium exterior, paintable acrylic-latex caulk to any gaps, cracks, or seams around windows, doors, and trim. This seals the envelope of your home against moisture and pests.
Step 5: Applying the Right Outdoor Primer
Never underestimate the power of primer. Applying a specialized outdoor primer CT climates demand will seal porous bare wood, block stains from cedar or redwood tannin bleed, and provide a binding layer for your topcoat. Spot-prime the areas where you scraped down to bare wood, or consider a full prime coat if the surface is severely weathered or if you are making a drastic color change.
Gathering Your Exterior Tools
To execute a professional-level job, you need the right gear. Sourcing high-quality exterior tools CT hardware stores offer will make the process safer and more efficient. Your checklist should include:
- Heavy-duty drop cloths to protect landscaping and walkways.
- Carbide-blade paint scrapers.
- Various grit sandpaper and an orbital sander.
- Extension ladders with stabilizers.
- Caulking guns and high-grade exterior caulk.
- Safety gear: respirators (especially if dealing with pre-1978 lead paint), safety glasses, and heavy-duty gloves.
Commercial vs. Residential Siding Prep in CT
While the fundamentals remain the same, siding prep CT projects vary greatly between residential and commercial buildings. Commercial properties often feature different substrates, such as masonry, stucco, or metal siding, which require specialized cleaning agents and rust-inhibiting primers. Additionally, commercial prep often has to be scheduled around business hours to minimize disruption to customers and employees, making speed and efficiency paramount.
Residential homes, particularly older New England styles with intricate wooden trim and cedar shingles, often require a much more delicate touch, relying heavily on manual scraping and detailed wood restoration.
Frequently Asked Questions (FAQ)
What is the most important part of prep for exterior painting?
The most important part of prep for exterior painting is removing all loose, flaking paint and ensuring the underlying surface is completely clean, dry, and sound. If the surface isn't stable, the new paint will fail regardless of its quality.
How long should a house dry after power washing before painting?
Generally, a house should dry for at least 48 to 72 hours after power washing before any primer or paint is applied. In humid Connecticut weather, or for highly porous wood, you may need to wait up to a week to ensure all moisture has evaporated.
Do I really need to use an outdoor primer?
Yes, especially on bare wood, repaired areas, or surfaces with heavy stains. Primer acts as an adhesive bridge between the siding and the paint, preventing peeling and extending the life of your exterior paint job.
Ready to Transform Your Connecticut Home or Business?
Properly executing the prep for exterior painting is back-breaking, time-consuming work, but it is the absolute foundation of a beautiful, lasting finish. If you want to protect your property from the harsh New England elements without giving up your weekends to ladders and scrapers, we are here to help.
Our experienced team specializes in meticulous preparation and flawless execution for both residential and commercial properties across Connecticut. Contact us today for a free, no-obligation estimate and let us bring your property’s exterior back to life!